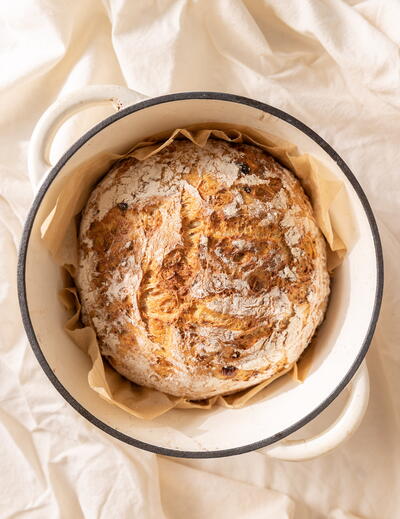
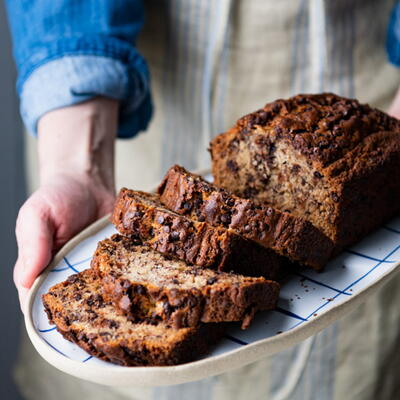
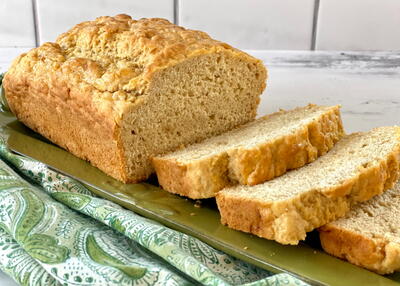
Muesli Bread | Müsli Brot

I love müsli, like I REALLY love it—it’s somewhere between oatmeal and granola, and it’s the perfect breakfast food. You know what else I love? Freshly baked, crunchy crusted bread with a soft and fluffy inside. And there’s really nothing that beats the smell of freshly baked bread in your kitchen, especially when it has dried fruit and oats inside. Well, this Muesli Bread has it all.
When I first started Red Currant Bakery, I baked a lot of bread; I would sell it as a way to pay for my expenses, along with a few other pastries. But the bread was always, without a doubt, everyone’s favorite. On days when I would bake a loaf for home, my mom and I would stand around the kitchen island and eat so many slices of the fresh bread, with a layer of her homemade jam on top, because it just made us happy.
P.S. This bread doesn’t have to be just sweet. It also makes the perfect grilled cheese or panini bread with any of your favorite toppings!
Active Time: 45 minutes
Total Time: 24 hours
Makes1 loaf
Ingredients
- Muesli
- 100 grams (13/4 cups) muesli (a traditional blend with oats, grains, and dried fruit is best)
- 50 grams (1/3 cup) dried fruit, such as dried cranberries or cherries
- 125 milliliters (1/2 cup + 1 tsp) milk
Pre-Dough- 100 grams (2/3 cup + 1 tbsp) bread flour
- 8 grams (2 tsp) instant yeast (1 packet)
- 100 milliliters (1/3 cup + 1 tbsp + 1 tsp) water, room temperature
Main Dough- 300 milliliters (11/4 cups) water, room temperature
- 50 grams (1/3 cup + 1 tbsp) whole wheat flour
- 400 grams (23/4 cups + 3 tbsp) bread flour, plus more for rolling
For Dusting- Brown rice flour
Instructions:
Muesli
-
The night before you plan on baking, combine the muesli, dried fruit and milk in a bowl and stir to combine. Cover the bowl and place it in the refrigerator until the next morning.
Pre-Dough
-
Just before bed, stir the flour and yeast together in a large glass or plastic bowl (ideally one with a lid). Pour in the water and stir to combine. Lay the lid on top but don’t seal it shut.
Main Dough
-
The next morning, take the muesli out of the refrigerator and set it on the counter. Check on the pre-dough—it should look bubbly and have grown significantly. If so, pour in the 300 milliliters (11/4 cups) of water for the main dough into the bowl with the pre-dough. Use a spoon and stir to combine. If not bubbly, let it sit a little longer somewhere warm. If it looks like it was bubbly but the bubbles have deflated, it is ok to use.
-
Pour in the whole wheat and bread flour and use your hands to just mix all the ingredients (except the muesli) together, until fully combined. It will be quite sticky. Lay the lid back over the bowl and let it sit for 40 minutes.
-
Once it has sat for 40 minutes, wet one hand with water. Pretending the bowl has four sides, grab the dough on one side of the bowl, gently pull it out and up and then fold it over the center of the dough. Rotate the bowl 90 degrees clockwise and repeat with the next side of dough. Repeat the turning and folding until all four sides have been folded. Lay the lid back on top and let sit for another 40 minutes.
-
After the 40 minutes, wet one hand again, then pour about a quarter of the soaked muesli mix onto the top of the dough. Fold one side of the dough over the muesli layer, then sprinkle another quarter of the muesli mix over the dough. Fold another side of the dough. Repeat until all the muesli has been used and all sides have been folded. Lay the lid back on top and let sit for 40 more minutes. Repeat the folding process two more times with 40 minutes of rest in between and after the second time.
-
Once folded and rested for the last time, prepare a round bread proofing basket or a medium- sized round bowl lined with a towel and dusted with a mixture of 50 percent brown rice flour and 50 percent bread flour—this will help to keep the dough from sticking. Sprinkle the dough and your work surface generously with bread flour. Turn the dough out of the bowl it has been in and onto the floured surface. Pat the dough down to knock the air out.
-
Using the same folding technique, but now imagining the circle has six sides, fold each side of dough into the center and press down. This dough is sticky, so use more flour as needed.
-
Flip the dough ball over so that the seam side is down on the work surface. Cup your hands around the back of the ball and gently pull it towards you, turning it slightly as you go. Repeat three to four times or until the dough is sticking to the surface.
-
Use a bench scraper to help pick up the ball of dough and place it into the bowl or basket that has been dusted with flour. Dust the top and sides of the dough with more flour and cover with a kitchen towel. Immediately turn on the oven.
-
Place a cast-iron Dutch oven with the lid into the middle of the oven. Then, preheat the oven to 500°F (260°C). This should take about 45 minutes. While the oven is heating up, get out two wire racks and place them close to the oven. Additionally, tear off a sheet of parchment paper, place it near your oven and dust it generously with flour.
-
Once the oven is hot, uncover the dough and re-dust the top with flour. Tip the dough out of the basket and onto the floured parchment paper. Use thick pot holders, or two together to take the Dutch oven out of the oven and place on one of the wire racks. It will be HOT so be careful. Use the pot holders to lift the lid and place it on the second rack. Use a bench scraper to help lift the dough off of the parchment paper and as carefully as possible, without burning yourself, place it into the Dutch oven.
-
Immediately, put the lid back on the pot and place it back in the oven. Turn the oven down to 450°F (232°C) and set a timer for 25 minutes. After 25 minutes, take the Dutch oven out of the oven and place it on a wire rack. Take the lid off and place it on the second rack. Return the bottom of the Dutch oven with the bread back into the oven and bake for another 20 minutes, until it is golden brown.
-
Once baked, take the Dutch oven out of the oven and turn the oven off. Tip onto one of the wire racks and leave it there to cool fully before cutting into it.
Notes
If you forget to start the pre-dough the night before, don’t worry, you can also do it when you wake up and just let it sit until it’s nice and bubbly. This will just push the baking time back to the evening rather than midday or early afternoon.
If you won’t be able to eat the entire loaf in 4 to 5 days, cut it in half and place half in a freezer bag and freeze. To defrost, take it out of the freezer and let it defrost for 4 hours at room temperature in the bag. This will keep the bread fresher than if stored in the fridge where it will dry out.
Read NextThree Ingredient Biscuits