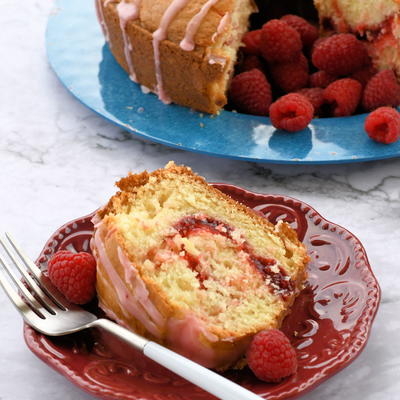
Pop Art Raspberry Icebox Cake

Turn a raspberry icebox dessert into a work of art with this recipe for Pop Art Raspberry Icebox Cake! With decorative polka dots and stripes, this is one of the most visually appealing dessert recipes we've seen in a while! To give your cake the cleanest look possible, make sure it's fully frozen before slicing.
Serves6
Ingredients
- 27 Nabisco Famous Chocolate Wafer Cookies
- 2 ounces bittersweet chocolate, melted and slightly cooled
- 1 envelope unflavored gelatin
- 3 tablespoons cold water
- 12 ounces frozen raspberries
- 3/4 cup sugar
- 2 cups heavy cream, chilled
- 2 tablespoons framboise (raspberry liqueur)
- 1 teaspoon vanilla extract
Instructions
-
Line a 91â„2 x 4 x 3-inch loaf pan with plastic wrap, making sure the wrap is tucked into all the corners and there is at least 1 inch overhanging the top of the pan on all sides. Working with one cookie at a time, spread the more rounded side of 9 of the wafer cookies with a thin layer of melted chocolate and place 3 of them, chocolate side down, on the bottom of the pan. Place another 3 cookies against each long side of the pan, chocolate-coated sides facing the pan. Place the pan in the freezer.
-
Sprinkle the gelatin over the cold water in a small bowl and let soften for 2 minutes.
-
Combine the raspberries and sugar in a medium-size heavy saucepan and cook over medium-low heat, stirring a few times, until the sugar dissolves and the mixture is warm to the touch. Stir in the gelatin mixture. Let cool to room temperature, stirring occasionally.
-
Combine the heavy cream, framboise, and vanilla in a large bowl and, using an electric mixer, whip until stiff peaks form. Gently fold in the cooled raspberry mixture, taking care not to deflate the cream.
-
Remove the pan from the freezer. Pour all but one-fourth of the mousse into the pan. Smooth the top with a rubber spatula. Insert the remaining 18 wafers into the mousse, arranging them vertically in three rows of six so they are lined up with the chocolate wafers on the sides of the pan. Spread the remaining mousse over the wafers and smooth with the spatula. The pan should be full to the top. Cover with plastic wrap and freeze until completely set, at least overnight and up to 1 week.
-
To unmold, gently tug the plastic wrap that lines the pan to loosen the cake. Place a serving platter over the pan and turn over. Gently tap to release. Carefully peel the plastic from the cake. Cut into slices and serve immediately.
Read NextAngry Birds Cake Pops
Your Recently Viewed Recipes


Thanks for your comment. Don't forget to share!
CreativityGoddess
May 23, 2012
The recipe directions are now included above. We apologize for any inconvenience. -Editors of RecipeLion
Peppermint Pixie
May 22, 2012
Honestly, I have better things to do than chase down the directions on another website. I don't like this practice at all. Either provide the whole recipe here, or don't mention it at all.
jeaninehill 686505 3
May 22, 2012
Thanks emily - the recipe directions were right where you said we could find them. This recipe looks delicious.
emily 1556735
May 22, 2012
Found the directions here: www.epicurious.com/recipes/food/views/Pop-Art-Raspberry-Icebox-Cake-238747 Looks amazing! i think im gonna try it for the next birthday party we have.
lazack 3374786
May 22, 2012
I thought I had lost my ability to use the computer when I couldn't find the directions!! LOL...lucky for my brain that I read the other comments! Please repost with the directions for this dessert!!
mamarana 4599156
May 22, 2012
No directions??? We get to guess how to make it. Now that's creative. Come one people, pay attention.
pennyhopkins3 3127 738
May 22, 2012
Please I want to make this soooo badly, put the instructions up so we can make this while raspberries are in season!!
Report Inappropriate Comment
Are you sure you would like to report this comment? It will be flagged for our moderators to take action.
Thank you for taking the time to improve the content on our site.